Overview
Quota sheets allow you to easily setup and manage both simple and complex interlocked quotas. Defining the quotas is done using a convenient user interface and with little effort.
STG offers you 2 ways to define your quotas:
Online Videos
Direct Youtube link (for full screen): https://youtu.be/JRzPvHorL8E
Direct Youtube link (for full screen): https://youtu.be/hQVKuIzw054
Direct Youtube link (for full screen): https://youtu.be/OOUgfPvVVSE
Quota Sheets
- Step 1: Define the quota sheet(s)
- Step 2: Edit the quota sheet targets
- Step 3: Track the progress
- Step 4: Quota Sheet Filter
Step 1: Define the quota sheet(s)
To define a new quota sheet:
- Open the survey you wish to generate data for:
- Select the “Quota Sheets” tab:

- Now you are ready to configure the quota sheets
- If needed you can add multiple quota sheets by clicking the “+” sign on the top left, next to the first sheet name
- The Use Global Quotas allows you to define the quotas as global or surveyor based. You should check this if you wish to have your quotas defined globally rather than per surveyor.
Please Note: Global Quotas can in certain scenarios lead to over quota for example in these cases:
1) Some surveyors were interviewing on the same time and captured the same quota of which the remaining target was 1.
2) The surveyors finished interviews but didn't upload the interviews for some time, so the global quotas statues was not updated on the server so other surveyor’s devices were not aware of the fact the that remaining quota is less than they actually see on the device.
- Once you are done configuring the quota sheets, save the survey.
Please Note: For CAWI interviews you will need to enable the option 'Use Quotas' in order for the interviews to capture the quotas
Here is a description of the various parts of the quota sheet:
| Component | Description |
| (0) Sheet name box | You can change the name o the sheet from this box |
| (1) List of questions | Contains all the single choice questions in the survey that can be used in the quota sheets |
| (2) Add to rows | After selecting a question click this button to add it to the rows of the quota sheet |
| (3) Add to columns | Adds the selected question as an interlock. Multiple interlocks can be defined. |
| (4) Rows/Columns list | Contains the list of questions. Drag a question next to the one above it to create an additional interlock level. |
| (5) Answers list | Allows you to de-select various answers that do not participate in the quota |
Using the lists in (4), you can also create a new interlock level by dragging a question next to the one above it:

Which will change the view to this:

Now Quota_Colors has an interlock level with Q_Brands:

Step 2: Edit the quota sheet targets
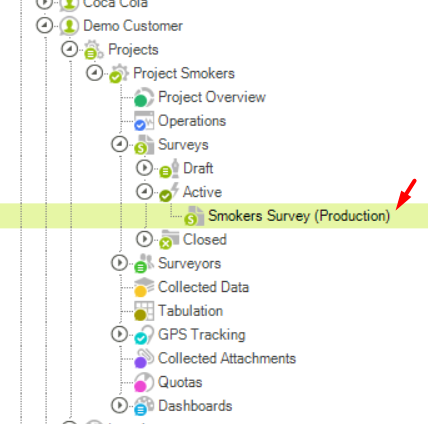
- Double-click the “Quotas” node from the tree:

- Choose from the active surveys and then switch to the “Editing” tab:

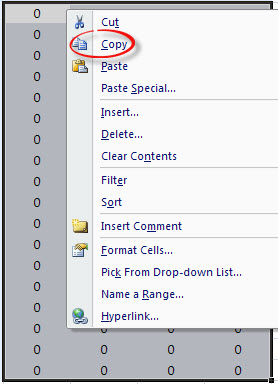
- You can then edit the targets by simply writing into the cells. You can also copy & paste a number of cells directly from Excel into the targets. Open the Tracking tab of the quotas view and press the Export Values button. Edit the values in the corresponding target fields in the excel

- Copy the relevant Columns and rows from the Excel
-
Open the Editing tab of the quotas view and then paste them to the sheet:

- Once the targets have been defined, click the “Save Changes” button to save the targets:

- Change Exceed Actions - you can control each quota's exceed action. The exceed action will determine what happens in case the quota is filled.
- - "None" - Interviews will keep being collected
- "Filter" and "Cancel" - Interviews will be canceled or filtered, and will be terminated at that point. To learn about the differences between a canceled interview and filtered interview enter here: Determining How Your Interviews Are Terminated - To do so, simply mark the quota/s and set the exceed action you want. Then press "Save Changes" as shown before
Step 3: Track the progress
To track the quota's progress:
- Double-click the “Quotas” node from the tree:

- Choose from the active surveys and then make sure you are on the tracking tab:

- If you wish to refresh the numbers, click the refresh button:

Surveyor Quota View
The surveyor can view at any given time the current status of his/her quotas. The surveyor can easily figure out how many subjects are still needed to be conducted for each quota. The SurveyToGo App on the device updates the quota status according to the survey results.
Please Note:
If you have more interviews than quotas captured, you can find the subjects that did not capture the quotas by following these steps:
- Open the quota sheets tracking - and mark all the quota data
- Right-click on the area selected (shown in yellow) and choose 'show quota subjects'
-
In the following screen choose the last option 'Show subjects that are NOT in any of the quotas'
- Click Export to Excel to get the list.
Step 4: Quota Sheet Filter
In this section, we will show you how to filter the Quota sheets so you will be able to assign different sheets to different users/groups.
For example: Your survey is done by regions and you have a user/group assigned to monitor the quota for each region with the Quotas sheets filter you will be able to implement, as follows:
- When you setup your quota sheets, you will need to decide on the convention names for each sheet in order to support this feature.
- Right-click on the User/Group and choose 'Quota Sheets filter'
- In the following screen, type the start of the Quota Sheet name (in our example: North) and 'Add New'
- Once a line is added ,click on Accept to finish - this will now show the user/group assigned only quota sheets that Start with the word 'North' in their name
Quotas in Web Surveys
To enable the Quota in CAWI surveys, navigate to the CAWI tab under the survey and choose Web Survey Display Options - under the Operation & Behavior enable the option 'Use Quotas'
- Max Interview Count - This option should be checked and defined to limit the amount of interviews collected for this survey for example: you would like 50 people only to answer this survey, once you reach this max the 51st person will not be able to answer the interview.
-
Quota Refresh - 2 Methods are available for the Quota Refresh during the interview:
- At each Session Start - This method will capture the quota when you start the interview and an interview that continues under the Min Time to recheck limit will ignore any quotas that are Over Quota at the moment the interview is continued.
- At each Quota Question - This method will capture a temporary quota once you reach the quota question and will dismiss it if respondent will stop & continue after the time of Dismiss quotas after X idle hours has passed.
Best Practices
- Quotas are checked at the beginning of a survey, when going over a question that makes part of the quota and at the end of a survey. If a question that takes part in the quota is set by questions after it, the quota will only be checked at the end of the survey. Best Practices is to never set quota questions from questions that come after them.
Setup Quota Notifications
Here we will describe how you can setup a notification to alert when the Quota is full or X% filled, to help monitor the progress
Online Video
Direct Youtube link (for full screen): https://youtu.be/HzlhDlf0wsc
Pre-Requisites
Before starting, please make sure that you have an Email connector setup, this will be used to send out the notification via email. Click Here to learn more how to setup your Email connector.
- Expand your Project Tree - CAWI Node and double click on 'CAWI Settings'
- Choose the survey you would like to setup the notification and click on '
- In the following screen setup the relevant conditions, add the users to send the notifications to and click on 'Save'
View in Insights
To view the Quotas in Dooblo Insights, go to the Quotas and click on "View in Insights":
-
Dooblo Insights provides an overall online dashboard visibility on the organization’s customers, projects and surveys as well as ability to monitor specific surveys' fieldwork data (Progress Report, Quota, GPS Tracking) available on any device. Click Here to go to Dooblo Insights: Introduction
That’s it!
Comments
Please sign in to leave a comment.