Overview
In addition to the native SurveyToGo question types and renderings, SurveyToGo allows you to write CAWI Rendering Packages that allow you to control how the question is rendered when running a CAWI survey.
For example, instead of showing the single choice question rendered as Highlighted Border as usual: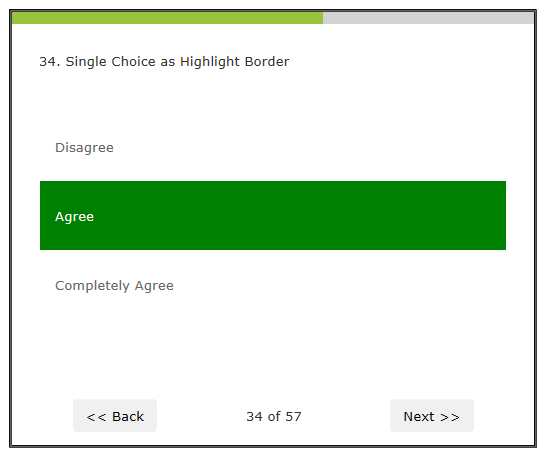
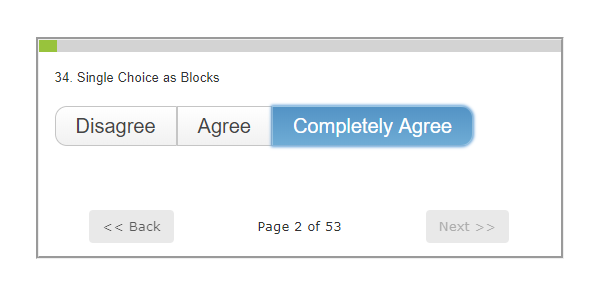
You can instead put in a custom Highlight Border control that will look different along with some custom behavior if necessary. For example, here is a JQuery Highlighted Border:
Now while the two sliders might look roughly the same, they are rendered very differently. The first is the default built-in Scale question rendering while the second is a completely custom rendered control using HTML and JQuery Mobile and is interacting with the SurveyToGo Engine to look as if it is a native question type even though it is not. The possibilities using this technique are endless and will allow anybody with basic knowledge of HTML and Javascript to create any custom question rendering that suite your specific project requirements.
In this How-to we will show you how to create a Render Package that can be used in SurveyToGo. Click here to learn more how to use the CAWI Custom Rendering Package once the zip file is ready.
We will base this guide on the free JQuery radio buttons rendered as Horizontal radio button sets that can be found here:
https://demos.jquerymobile.com/1.2.0/docs/forms/radiobuttons/
Creating a link to the Custom Rendering Package Studio
- Navigate to the Library -> Organization CAWI Custom Rendering Packages node
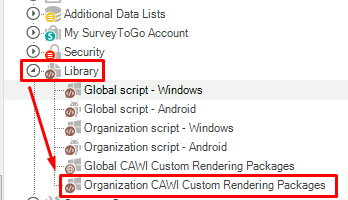
- Double Click to Open
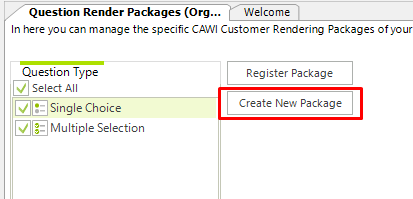
- Click on 'Create New Package'
- Provide a name to the package and choose a survey to use
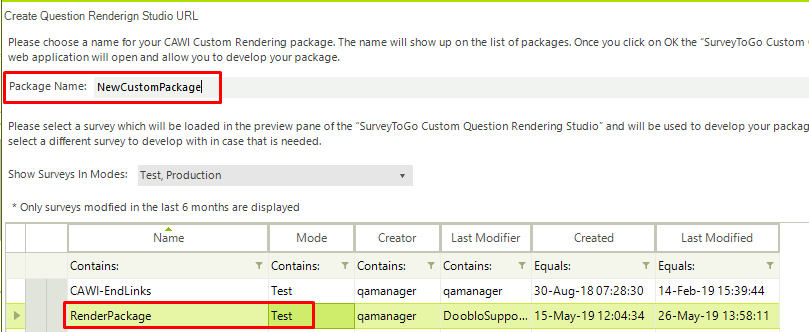
- Click OK
- When prompt with the message below click 'Yes'

- The browser will be opened with a blank studio , the URL will include the URL address, unique ticket number & Package Name which is the name of the package you created.
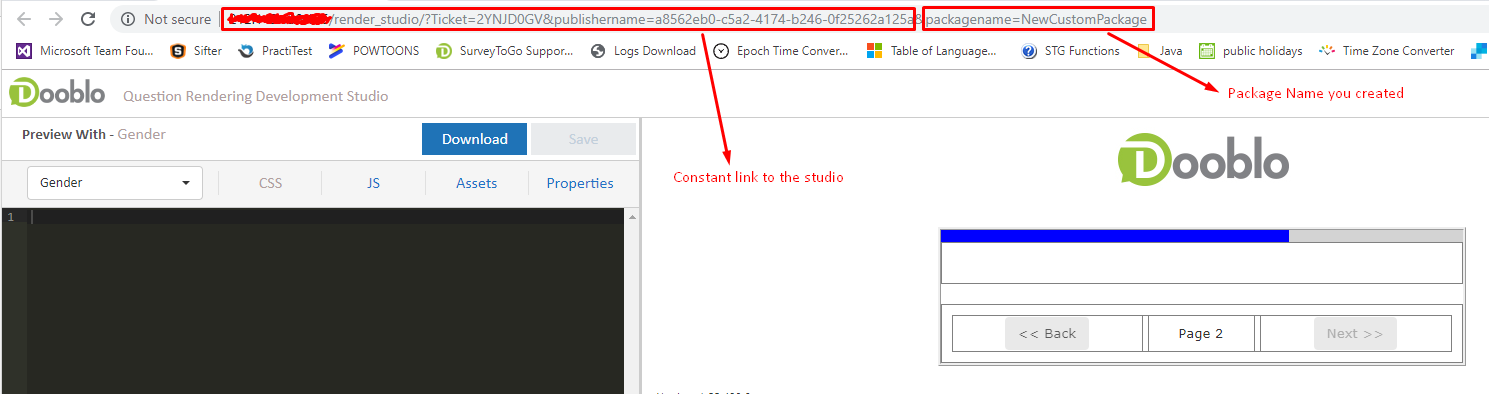
- The URL you created can be sent to your scripter to work on creating the Custom Package, this URL can be entered from the web and doesn't require the SurveyToGo Studio.
- You are now ready to start.
Using the Development Studio

The studio is complied of the following:
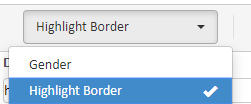
- Question Picker - Choose the questions you would like to customize and review
- CSS - Update and customize the display using CSS.
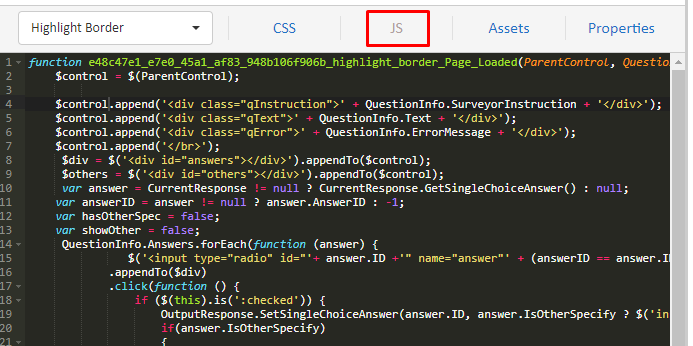
- JS - Write your code for the custom render
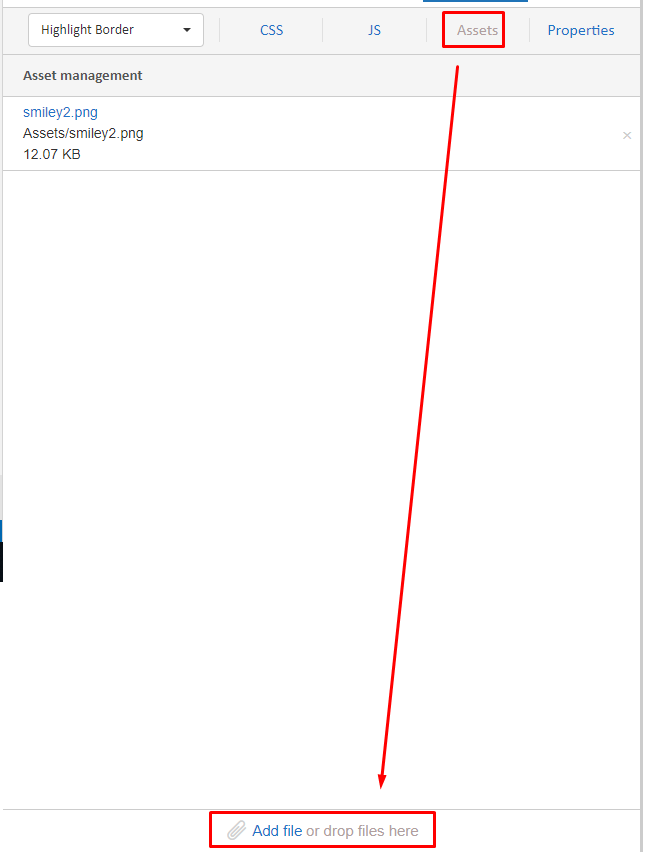
- Assets - Add images and other assets to be used as part of the package.
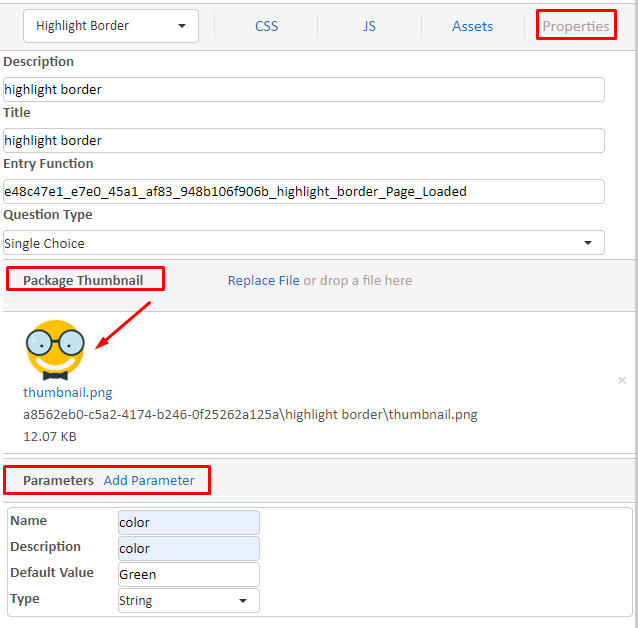
- Properties - Customize the package properties such as: Description, thumbnail, relevant question type , Parameters - default parameters for this custom render such as Color etc.
- Scripting Area - This is the area designed to write the script using either CSS or JS.
When writing the JD code it should always be included in the main function which should be written in the following format:
- <PUBLISHERID>_<PACKAGENAME>_Page_Loaded(ParentControl, QuestionInfo, OutputResponse, CurrentResponse, AssetsBaseUrl)
You need to replace the following 2 parameters as follows:- PublisherID - this is taken from the URL created for the studio

- PackageName - The package name you entered when creating a new package, can also be taken from the URL

- PublisherID - this is taken from the URL created for the studio
Please Note: Click Here to see the description, Properties & Methods of each of the main function parameters.
- <PUBLISHERID>_<PACKAGENAME>_Page_Loaded(ParentControl, QuestionInfo, OutputResponse, CurrentResponse, AssetsBaseUrl)
- Display Area - Once you would like to view your work and what it would look like, save your work and the right pane view will be refreshed.
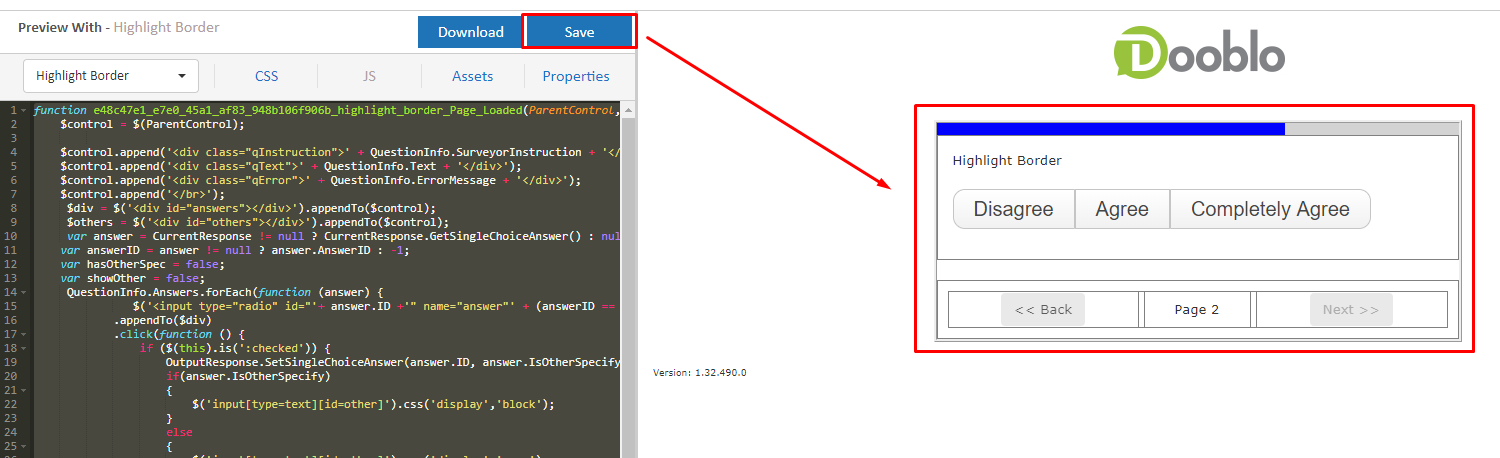
- When done and saved - click on 'Download' to create the package.
Please find attached a sample Custom Render Package.
That's It !
Comments
Please sign in to leave a comment.